Oops! Something went wrong while submitting the form.
How to Unlock Cells in Excel & Google Sheets Guide
Learn practical ways to unlock protected cells in Google Sheets and Excel while an AI computer agent maintains protections at scale across business files.
Locked cells are great—until they get in the way of work. Sales teams need to adjust quotas, finance needs to tweak forecasts, agencies need clients to fill in briefs. If the wrong cells are locked in Excel or Google Sheets, everyone stalls and tickets pile up: “Can you unlock this tab for me?” Knowing exactly how to unlock only the right cells lets you protect formulas and structure while keeping day‑to‑day edits frictionless. It also means you can standardize templates across your company without becoming the bottleneck every time someone needs one more column editable.
Now imagine you never had to touch those protection settings again. An AI computer agent can open Excel or Google Sheets, unprotect the right sheets, unlock just the ranges you specify, then reapply protection across dozens of files. Instead of manually clicking through review menus all afternoon, you describe the rules once and the agent maintains them for every campaign sheet, report, and client dashboard on autopilot.
How to Unlock Cells in Excel & Google Sheets Guide
1. Manual ways to unlock cells in Excel and Google Sheets
Before we automate anything, you need the core mechanics.
A. Unlock all cells in an Excel worksheet
Open your workbook in Excel.
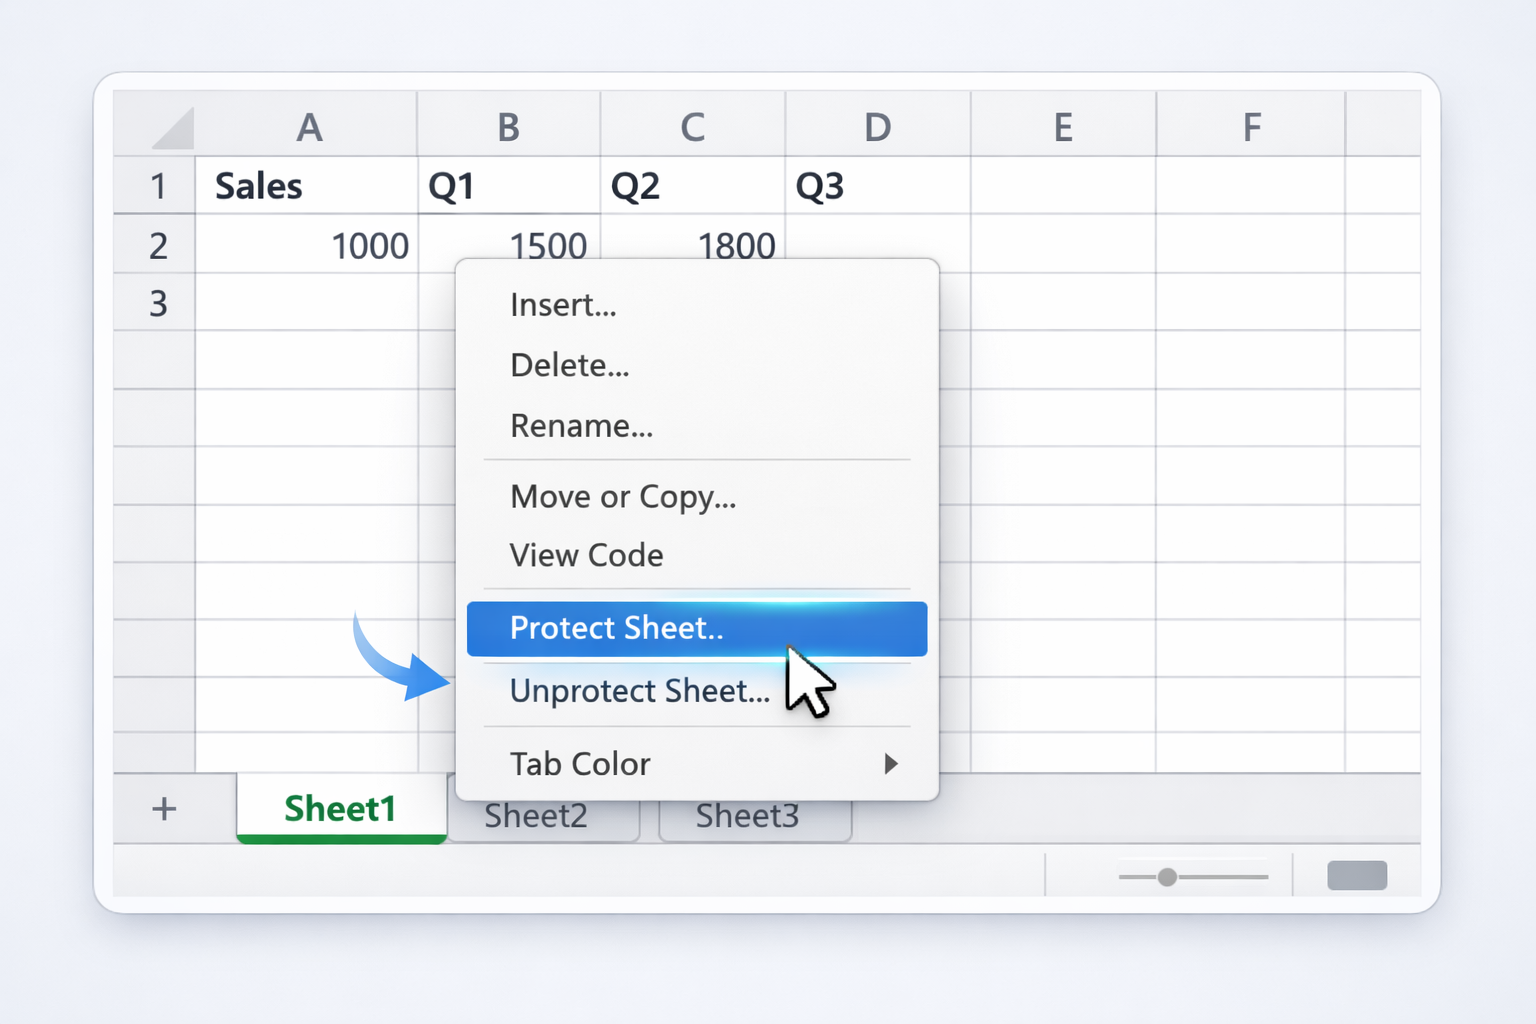
Right‑click the sheet tab you want to edit.
Click “Unprotect Sheet…”.
If the sheet has a password, enter it and click OK.
All previously locked cells on that sheet are now editable.
In Google Sheets, protections live at the cell or sheet level.
Open the sheet in Google Sheets.
Click Data → Protected sheets and ranges.
In the right sidebar, select the protected range or sheet you want to adjust.
To fully remove protection, click the trash bin icon.
To make only part of it editable, change the range reference, or on a protected sheet, use “Except certain cells” and define which cells remain editable.
Name it like “ToggleProtection”, store in This Workbook.
While recording, unprotect the sheet, select and change the Locked property on the ranges you need, then protect the sheet again with your desired options.
B. Office Scripts / Power Automate (Excel on the web)
For teams on Microsoft 365:
In Excel for the web, use Automate → “Record Actions” to capture unprotecting, unlocking ranges, and reprotecting.
Save the script.
In Power Automate, create a flow that runs this Office Script on a file when it’s created in a specific OneDrive or SharePoint folder. Outcome: any new template dropped into that folder gets the same unlock/lock logic applied automatically.
C. Google Apps Script to standardize protections
If you manage many Google Sheets templates:
Open a Google Sheet and go to Extensions → Apps Script.
Use a simple script to clear protections, then add new protected ranges programmatically using the Protection service.
Attach the script to a custom menu so non‑technical teammates can run it from the sheet.
Optionally trigger it when the file is opened. This keeps templates consistent without hunting through the Protected sheets sidebar every time.
D. Workflow tools like Zapier or Make
While Zapier and Make cannot directly click “Unprotect sheet”, they can trigger scripts that do:
For Sheets, set up a Zap that fires when a new spreadsheet is created from a template in Google Drive.
The Zap calls a Google Apps Script Web App endpoint that runs your protection/unlock logic.
For Excel, a Power Automate flow can play the same role when new files are added to a OneDrive folder.
3. Scaling with AI agents like Simular
Manual and no‑code flows still assume someone keeps an eye on things. An AI computer agent like Simular Pro can sit above your tools and handle the messy, cross‑app work.
A. Agent that adjusts protections per request
Story: your sales ops lead gets daily requests like, “Can you unlock column F in this Excel quota sheet?” With Simular:
You record or describe the workflow once: open the file (Excel or Sheets), find the right tab, unprotect, adjust Locked or protected ranges, save, and confirm.
The Simular agent can now repeat this on any similar file, triggered via a simple form or webhook. Pros: no macros to maintain, works across desktop Excel, Excel for the web, and Google Sheets. Great for non‑technical teams. Cons: requires initial setup and clear instructions; best for recurring patterns, not one‑off edge cases.
B. Agent to standardize protections across many files
Imagine migrating 200 client reporting workbooks to a new structure:
Point Simular at a folder of Excel and Sheets files.
For each file, the agent opens it, removes legacy protections, applies your new standard of locked formulas and unlocked inputs, and saves.
Simular’s transparent execution lets you inspect each step before running at full scale. Pros: massive time savings, consistent rules, auditability. Cons: you should test on a small batch first and keep backups.
C. Agent as a guardrail for template usage
You can even have Simular run nightly checks:
The agent opens key team spreadsheets.
If it detects unlocked formula ranges or missing sheet protection, it corrects them and logs a report.
Any anomalies are surfaced to an ops owner. Pros: continuous quality control without you babysitting spreadsheets. Cons: needs thoughtful configuration so it does not override intentional one‑off changes.
Blending these approaches gives you a ladder: start with manual skills, add light automation, then let an AI agent carry the repetitive protection work so you and your team can focus on analysis, not menus.
AI agents to unlock spreadsheet cells at scale
Train Simular agent
Set up a Simular AI computer agent with a clear playbook: how to open Google Sheets or Excel, unprotect sheets, unlock specific ranges, then safely reapply protection rules.
Test and refine agent
Use Simular Pro’s transparent execution to watch each click as the agent unlocks Excel and Google Sheets cells, then tweak prompts until the first end‑to‑end run is flawless.
Scale delegation tasks
Once reliable, delegate all repeat unlock requests to the Simular AI agent and trigger it via webhooks so it maintains protections at scale across Sheets and Excel templates.
Learn how to automate Google Sheets
Use Google Sheets protections to lock formulas while unlocking specific input cells so teams can safely edit data without breaking your core calculations.
In Excel, unlock cells by removing sheet protection or allowing editable ranges so you can tweak data without exposing critical formulas to accidental edits.


.svg)