Oops! Something went wrong while submitting the form.
How to Build Advanced HubSpot Lead Routing Systems
Turn HubSpot lead routing into a reliable growth engine by pairing smart workflows with an AI computer agent that watches your CRM and routes every lead on time.
Lead routing sounds simple until your form fills spike, territories overlap, and reps argue about “who owns” which deal. HubSpot gives you the structure: unified contact data, form capture, scoring, and workflows to send the right prospect to the right queue. When routing is tight, speed-to-lead improves, reps trust the system, and marketing knows high-intent demand won’t leak.
But rules alone aren’t enough in fast-moving teams. An AI computer agent layered on top of HubSpot can watch every new record, enrich missing context, and correct routing in real time. Instead of ops teams babysitting workflows, the agent audits assignments, rebalances loads, and flags edge cases for humans. Imagine a tireless digital RevOps assistant that never sleeps, calmly steering each new lead to exactly the right owner while your sales team just opens their queue and sells.
How to Build Advanced HubSpot Lead Routing Systems
1. Traditional & Semi-Manual HubSpot Lead Routing
These approaches are where most teams start. They’re simple, but they don’t scale.
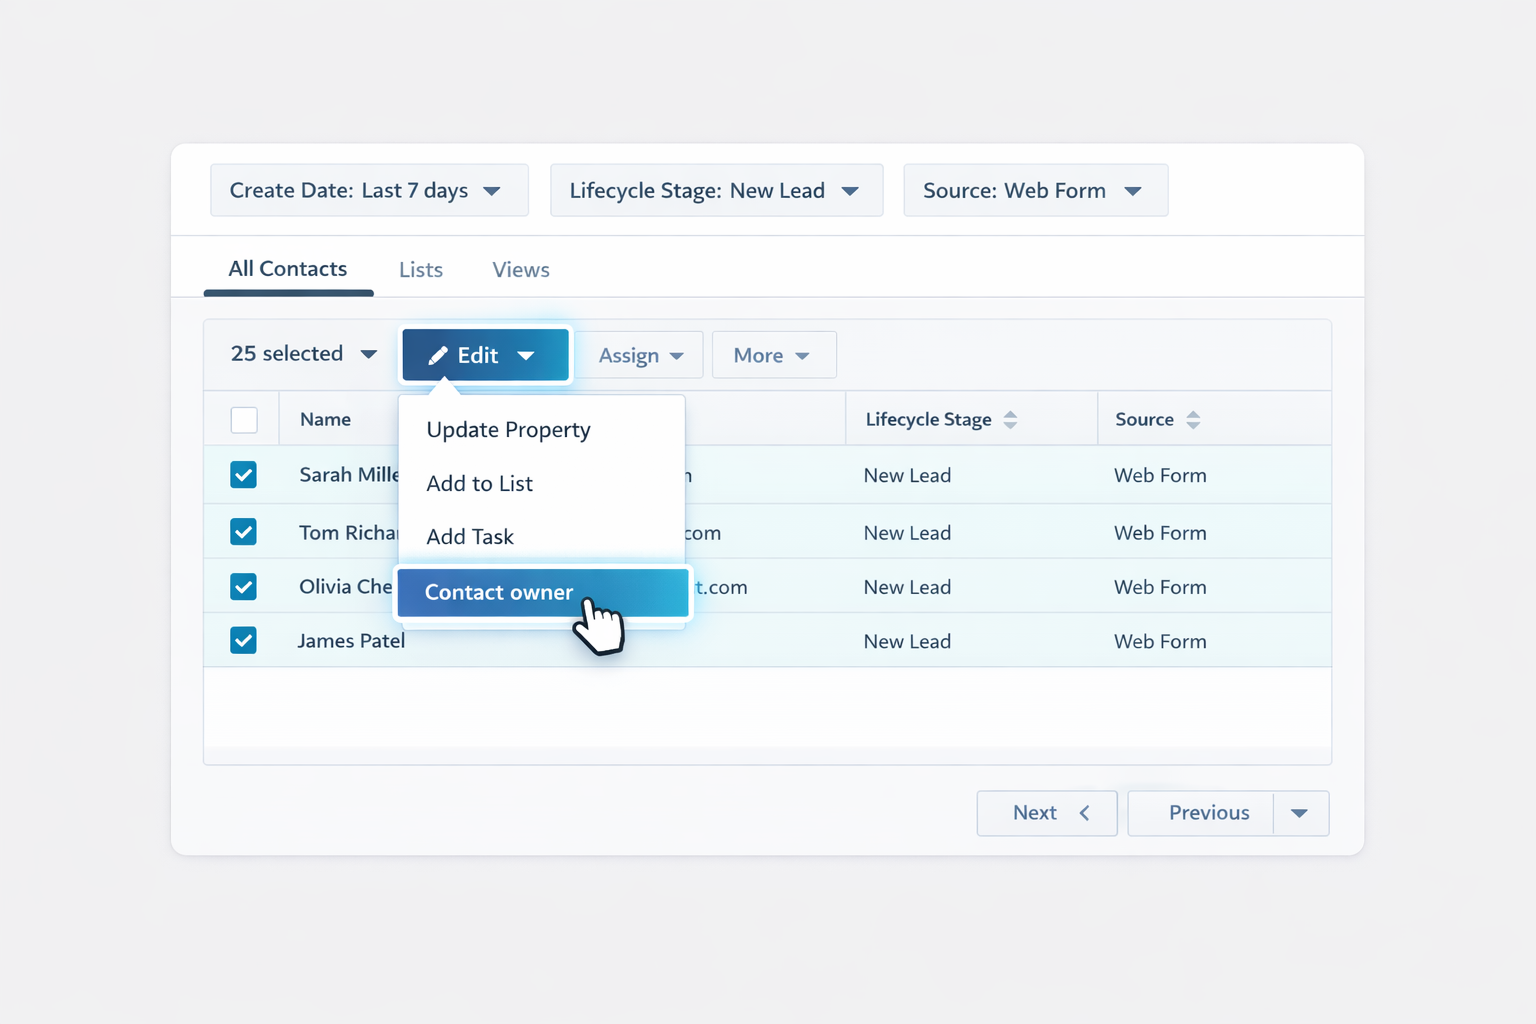
A. Manually assign contact owners
In HubSpot, open Contacts > Contacts.
Filter for new leads (e.g., by create date, lifecycle stage, form, or list).
Select contacts in bulk.
Click Edit, choose Contact owner, and assign to the right rep.
Repeat daily or multiple times a day. Pros: Full human judgment; good for small teams. Cons: Slow, error-prone, depends on someone remembering to run it.
B. Spreadsheet-style round robin
Export new leads from HubSpot into a CSV.
Sort by create date.
Add a column for Owner and distribute leads one-by-one or using a formula (e.g., every third lead to each rep).
Re-import and map the Contact owner field. Pros: Feels “fair” for tiny teams. Cons: Leads wait hours, you risk duplicates, and it’s fragile as volume grows.
C. Manual territory routing
Create a custom property such as Territory or use Country/State.
Filter contacts by that property.
In each territory view, bulk assign owners as in step A.
Document rules for who owns which regions in an internal playbook. Pros: Basic coverage model; easy to understand. Cons: Still manual, and changes require human updates everywhere.
These methods work if you’re under ~50 new leads a week. Beyond that, you’ll feel the drag.
2. No-Code HubSpot Automation for Lead Routing
HubSpot’s workflows are your first serious step toward scalable routing.
A. Route by form and lifecycle stage
Go to Automation > Workflows in HubSpot.
Create a Contact-based workflow.
Enrollment trigger: Form submission is any of [your key forms].
Add conditions: lifecycle stage, region, company size, or product interest.
Use Set property value to assign Contact owner or Deal owner, or use Rotate record to owner actions for round robin.
Add internal notifications and task creation so reps get pinged instantly. See HubSpot’s workflow docs at https://knowledge.hubspot.com/workflows for detailed setup guidance.
B. Lead scoring–driven routing
Configure HubSpot Score in Settings > Properties > HubSpot Score.
Add positive points for high-intent behaviors (pricing page views, demo requests) and negative points for low-fit.
In a workflow, enroll contacts when HubSpot Score is greater than or equal to X.
Route high-score leads to your senior reps or an enterprise queue; send low-score leads into nurture.
Pros of no-code workflows: scalable, fast, native to HubSpot, transparent for ops teams. Cons: complex edge cases become hard to model; rules can conflict; constant tweaking is needed as teams grow.
3. Scaling Lead Routing with an AI Agent (Simular)
When routing rules, enrichment, and exceptions start overwhelming your RevOps team, it’s time to add an AI computer agent as a digital operator.
A. Simular agent as a Lead Routing Auditor Use Simular Pro (https://www.simular.ai/simular-pro) to create an agent that behaves like a meticulous RevOps analyst:
Schedule the agent to open HubSpot daily.
It navigates through saved views for “New leads,” “Unassigned MQLs,” and “Stalled MQLs.”
For each record, it checks owner, score, geography, and recent activity.
When it finds misrouted leads (e.g., high score but unassigned), it corrects the owner, updates properties, and logs a note.
You can inspect every action thanks to Simular’s transparent execution. Pros: Catches routing leakage, reduces manual QA, operates across browser UI. Cons: Requires initial configuration and testing; still depends on your underlying logic.
B. AI agent for dynamic multi-source routing Some rules live outside HubSpot (e.g., rep expertise in a Google Sheet, live calendar capacity, or partner agreements). A Simular agent can:
Open HubSpot to watch for new MQLs in real time.
Pull rep capacity or specialization from spreadsheets, Notion, or internal tools.
Look up the prospect on LinkedIn or their website to infer industry and complexity.
Decide which rep is the best fit given value, vertical, and availability.
Assign the owner in HubSpot, create a follow-up task, and drop a note in Slack. Pros: Holistic, human-like decisions across multiple apps; no need for brittle custom integrations. Cons: Slightly higher setup effort; best for teams with enough volume to justify it.
C. Continuous optimization with an AI agent Finally, let the agent help you improve routing over time:
Weekly, the Simular agent exports closed-won and closed-lost deals from HubSpot.
It analyzes patterns (which reps perform best in which segments) and surfaces “suggested routing changes” in a Google Doc.
After human approval, the agent updates HubSpot workflow settings and team assignments. Pros: Data-driven refinement without manual number-crunching; keeps routing aligned with reality. Cons: Needs clear guardrails and approval steps.
By combining HubSpot’s native workflows (for deterministic, always-on routing) with a Simular AI computer agent (for cross-app logic, QA, and optimization), you get the best of both worlds: predictable automation plus adaptive intelligence.
Guide: Scale HubSpot Lead Routing with AI Agents
Onboard Simular to CRM
Install Simular Pro on your Mac, record a sample HubSpot lead routing session where you filter new leads and assign owners, then let the agent learn each click before running solo.
Test and refine routing
Start Simular on a sandbox or low-risk HubSpot list, compare its assignments to your playbook, tweak prompts and rules, then rerun until the AI agent routes leads correctly first time.
Scale routing with agent
Point Simular at your main HubSpot views, schedule it to watch for new MQLs, auto-assign owners, and audit workflows, so lead routing scales without adding more RevOps headcount.
Learn how to automate Hubspot
HubSpot is a CRM and marketing platform that captures, scores, and routes leads so sales and marketing teams can respond faster and close more qualified deals.


.svg)