How to build a QuickBooks Excel chart of accounts guide

A practical guide for Quickbooks and Excel users to build charts of accounts faster by pairing templates with an AI computer agent that handles the clicks.
Advanced computer use agent
Production-grade reliability
Transparent Execution

Why Quickbooks Excel plus AI

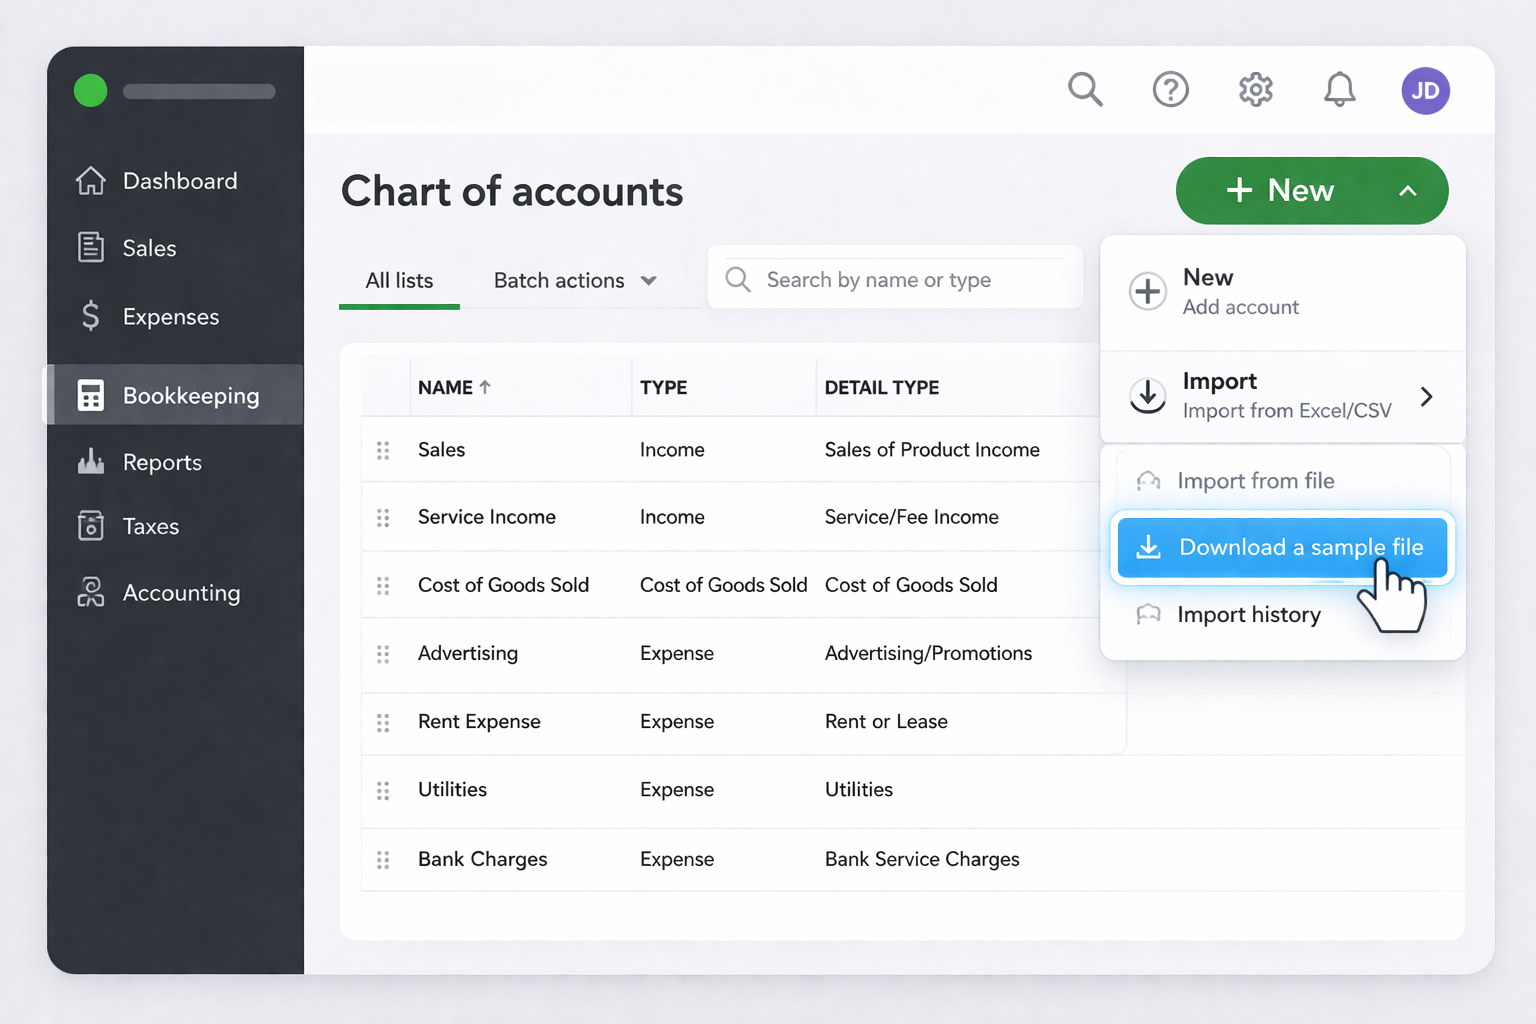
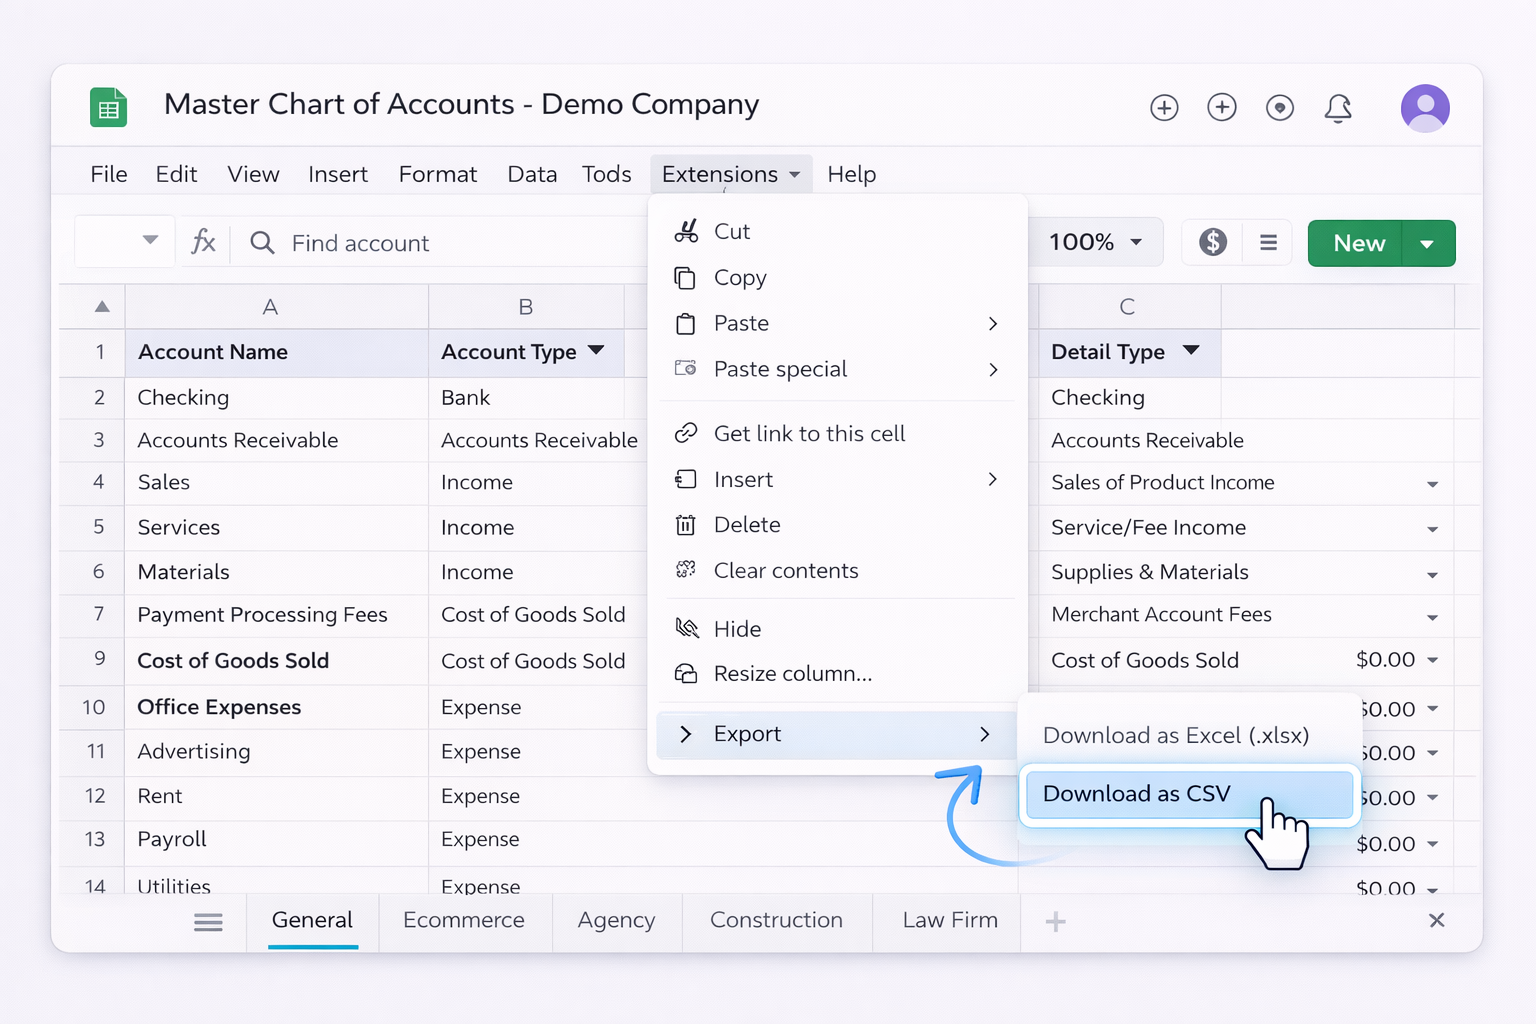
If you have ever spent a late night hand-editing a QuickBooks chart of accounts template in Excel, you know the pain. Columns to align, account types to match, detail types to double check, GST or tax codes to set, and then the nerve‑wracking import into QuickBooks, hoping there are no red error rows.The template workflow itself is brilliant: start from a proven structure, customise for your industry, then import once into QuickBooks so every balance, P&L, and cash flow report is grounded in a clean CoA. But it is also fragile. One wrong account type, a duplicated name, or a bad date format and you are back in Excel hunting for what went wrong. For accountants, agencies, and operators doing this across dozens of clients, that friction multiplies fast.This is where pairing QuickBooks and Excel with an AI computer agent changes the story. Instead of you doing every click, the agent learns your preferred structure, edits templates in Excel, validates against QuickBooks rules, and even re‑runs imports when something fails. You become the architect of the chart of accounts; the agent becomes the tireless implementer, executing the same precise workflow at 11 pm that it did at 9 am.Delegating the QuickBooks chart of accounts template work to an AI agent means you stop babysitting spreadsheets and imports. The agent downloads templates, fills required green fields, enforces naming rules, and retries QuickBooks imports until everything is green. You review the result, not the tedious steps, freeing your time for pricing strategy, client advisory, or campaign planning.

How to build a QuickBooks Excel chart of accounts guide

## 1. Traditional ways to manage QuickBooks CoA templates in ExcelThese are the classic, fully manual methods most firms start with.### 1.1 Download the official QuickBooks template1. Sign in to QuickBooks Online.2. Go to Bookkeeping → Chart of accounts.3. Click the dropdown next to New, choose Import.4. Select 'Download a sample file' to get the Excel template. Official guide: https://quickbooks.intuit.com/learn-support/en-au/help-article/accounting-bookkeeping/set-chart-accounts-using-quickbooks-online/L2yc6KBob_AU_en_AU### 1.2 Explore and respect the template structure1. Open the Excel file.2. Review column headers such as Account Name, Account Type, Detail Type, Tax Rate, and Opening Balance.3. Do not edit row 1 headers or change file type; keep xlsx or csv.4. Note which columns are marked as required (typically highlighted in green in the Intuit template).### 1.3 Manually customise your chart of accounts1. Add or rename accounts to match your business or client industry.2. For each row, choose an Account Type and Detail Type from the allowed QuickBooks lists. The allowed types are documented here: https://quickbooks.intuit.com/learn-support/en-us/help-article/chart-accounts/import-chart-accounts/L9Res1eb1_US_en_US3. Set Tax or GST rates where required. Ensure GST is configured first: https://community.intuit.com/articles/17627614. Optionally enter Opening Balances and Dates for starting figures.### 1.4 Create account hierarchies in ExcelQuickBooks supports header and sub-accounts:1. Choose a header account name, for example 'Marketing'.2. On the next row, in Account Name, enter 'Marketing:Advertising' to create a sub-account.3. Use the same Account Type for header and sub-accounts (for example, Expenses).4. Repeat for other rollups such as 'Travel:Airfare', 'Travel:Lodging'.### 1.5 Import into QuickBooks and fix errors1. In QuickBooks Online, return to Bookkeeping → Chart of accounts → Import.2. Upload your edited Excel file.3. Map columns from your file to QuickBooks fields.4. At step 3 of the import, review any red‑flagged errors. Intuit’s error reference is in the same help article: account name, type, tax rate, currency, and date format issues are common.5. Switch back to Excel, correct the rows, save, and re‑import until all rows pass.**Pros:** Full control, no extra tools, ideal for a first‑time setup.**Cons:** Slow, error‑prone, hard to repeat across many entities or frequent restructures.## 2. No-code automation with tools like Zapier and MakeOnce you move beyond one business, you start feeling the drag of repetition. Here are no‑code patterns to speed things up without writing code.### 2.1 Central CoA master in Excel or Google Sheets1. Build a master chart of accounts workbook with separate tabs per industry or client segment.2. Use formulas and data validation lists to standardise Account Type and Detail Type values so they always match QuickBooks options.3. When creating a new company, duplicate the relevant tab, tweak names, then export just that tab as csv.4. Import the csv into QuickBooks using the standard import flow.**Pros:** One source of truth, fewer ad‑hoc edits, still human‑friendly.**Cons:** Still manual exporting and importing, and you must keep QuickBooks account type lists in sync by hand.### 2.2 No-code workflows for template distributionUse Zapier, Make, or Power Automate to orchestrate files.Example workflow:1. Trigger: New QuickBooks company or new client record in your CRM.2. Action: No‑code tool copies the right CoA tab from a master Google Sheet into a new Sheet or Excel file.3. Action: Save that file into a shared folder (OneDrive, SharePoint, or Google Drive) named after the client or entity.4. Human step: Accountant reviews the file, then imports into QuickBooks.**Pros:** Automates file preparation and naming, useful for agencies and bookkeeping firms onboarding many clients.**Cons:** Still relies on a person to open QuickBooks and run the import; error handling is manual.### 2.3 Validation helpers inside Excel1. Use Excel data validation lists for Account Type, Detail Type, and Tax Rate, sourced from a locked reference tab.2. Add conditional formatting to highlight missing required fields or duplicate Account Names.3. Use simple formulas to ensure account numbers are unique. Excel reference: https://support.microsoft.com/en-us/office/create-or-remove-a-drop-down-list-7693307a-59ef-400a-b769-c5402dce407b**Pros:** Reduces import errors before you ever touch QuickBooks.**Cons:** Still spreadsheet‑centric, and rules must be updated with every QuickBooks change.## 3. Scaling with AI agents (Simular) across QuickBooks and ExcelAt some point, even no‑code flows are not enough. You are still the one clicking through QuickBooks imports, opening Excel, and hunting down mismatched types. This is where an AI computer agent like Simular Pro turns your CoA workflow into a repeatable, autonomous process.Simular is a production‑grade computer use agent that can operate across your desktop, browser, and cloud apps. It can open Excel, manipulate templates, log into QuickBooks, and run long, multi‑step workflows with transparent, inspectable steps.### 3.1 Method 1: Agent as your CoA template operator**Workflow:**1. You drop a new client brief into a folder or a CRM note describing industry, tax region, and any special accounts.2. The Simular agent opens the official QuickBooks Excel sample file, clones your master CoA tab, and adjusts names and tax codes based on the brief.3. It validates required columns, checks uniqueness of Account Names and Numbers, and applies your hierarchy conventions.4. The agent signs into QuickBooks Online, navigates to Bookkeeping → Chart of accounts → Import, uploads the file, maps fields, and runs the import.5. If QuickBooks flags any rows in red, the agent reads the error messages, switches back to Excel, fixes the data, saves, and retries until successful.**Pros:** Massive time savings, consistent execution, ideal for firms managing dozens or hundreds of entities.**Cons:** Requires an initial investment in designing and testing the workflow; best suited to stable, well‑defined CoA standards.Official QuickBooks import docs to reference in your agent instructions: https://quickbooks.intuit.com/learn-support/en-us/help-article/chart-accounts/import-chart-accounts/L9Res1eb1_US_en_US### 3.2 Method 2: Continuous CoA maintenance at scaleBeyond initial setup, charts of accounts drift: new product lines, new marketing channels, new tax rules.**Workflow:**1. You maintain a master CoA definition in Excel or Sheets.2. On a schedule, Simular opens the master file, compares each client’s current QuickBooks CoA (exported via the QuickBooks interface to Excel) against the standard.3. It highlights or auto‑adds missing accounts in the client template and runs the import back into QuickBooks.4. A summary report is generated into a Google Sheet or Excel file, listing what changed per client.**Pros:** Keeps every entity aligned to your standard without you reconciling lists one by one.**Cons:** Needs careful governance so automated changes do not conflict with bespoke client requirements.### 3.3 Method 3: Error‑handling and troubleshooting conciergeQuickBooks imports often fail for small reasons: dates, currencies, duplicate names.With Simular:1. The agent monitors import attempts in QuickBooks.2. When it sees red‑flag errors, it captures screenshots, parses the error list, and opens the source Excel file.3. It corrects formats and values according to rules you define (for example, date formats or naming conventions), then retries the import.4. If an error cannot be auto‑resolved, it posts a summary note to your team (for example, in Slack or email) with exactly which rows need a human decision.**Pros:** You almost never see raw error dialogs; you see curated issues. Great for busy finance teams.**Cons:** Requires clear exception policies so the agent knows when to stop and escalate.By combining the official QuickBooks and Excel templates with an AI computer agent, you keep the reliability of Intuit’s workflow while offloading the drudgery. You design the chart of accounts; the agent does the clicking, formatting, and re‑trying, at a scale no human team could match.

Heading 1

Heading 2

Heading 3

Heading 4

Heading 5
Heading 6

Lorem ipsum dolor sit amet, consectetur adipiscing elit, sed do eiusmod tempor incididunt ut labore et dolore magna aliqua. Ut enim ad minim veniam, quis nostrud exercitation ullamco laboris nisi ut aliquip ex ea commodo consequat. Duis aute irure dolor in reprehenderit in voluptate velit esse cillum dolore eu fugiat nulla pariatur.

Block quote

Ordered list

  1. Item 1
  2. Item 2
  3. Item 3

Unordered list

  • Item A
  • Item B
  • Item C

Text link

Bold text

Emphasis

Superscript

Subscript

Scale QuickBooks Excel CoA with AI agents at scale

Train Simular on CoA
Install Simular Pro, then record a first run where the agent downloads the QuickBooks sample file, edits the Excel chart of accounts, and walks through the full import flow.
Validate Simular run
Use Simular Pro’s transparent execution to watch every Excel and QuickBooks step, tweak prompts and rules, and verify the CoA import succeeds cleanly on multiple test companies.
Delegate CoA to AI
Once the workflow is stable, schedule or trigger the Simular AI agent to handle all new QuickBooks chart of accounts Excel templates so your team simply reviews final reports at scale.

FAQS